You can convert your internal hard drive into a portable external USB hard drive. It is easy and cheap. The reason you might want to do it is several –
- Your computer is dead. If you do not want to spend a lot of money trying to salvage the whole machine but need access to your data, converting your internal hard drive to an external USB one is real handy. Remember that even if your computer is dead, the hard drive might still be absolutely fine. Even if the boot sector of the internal drive is bad (i.e. your computer does not boot due to a hard drive failure), it might be still good for retrieving your data when used as an external USB drive.
- You want to upgrade your computer’s storage space but there is no room for installing an extra internal hard drive. You can buy a new internal drive and convert your older drive into an external USB drive.
So let’s get started.
What do you need to convert an internal hard drive to an external USB hard drive?
- Internal hard drive.
- Check whether it is an IDE/PATA drive or a SATA drive. This is important. You can either check the connection pin configuration to determine whether it is a SATA or an IDE/PATA. However a much easier way to do it is just to check your computers manual or search for your model number in the company website.
- It is a 2.5” hard drive or a 3.5”? Check as in the previous case. Generally laptops have 2.5” and desktops have 3.5”.
- External cover for the hard drive (might include a USB cable too)
- You have to buy it in a computer store (in the range $10-$50). Make sure it is compatible to your internal hard drive (i.e. its type (SATA or IDE) and its size (2.5” or 3.5”))
- A screw-driver (typically a Philips screw-driver looks like a crosshead)
Now that we have everything, let’s do the job. I did it for the internal SATA 2.5” hard drive of a HP dv6119us (HP dv6000 series) laptop using an external hard drive cover bought from NexStar. The procedure outlined here might vary if you are using different components, but the method should be pretty general.
- Getting the internal hard drive
- Keep your laptop upside down. Open the screws holding your hard drive cover (fig p-1).
- Remove screws holding the hard drive to its compartment, if any (fig p-2). Then apply a little force with your fingers or the screwdriver to disengage the hard drive and take it out (fig p-3).
- Remove any protective attachment or any connector to the hard drive otherwise it won’t fit in the external case. (fig p-4a & p-4b)
- Note that these steps or the position of the hard drive or the screws might vary from laptop to laptop. Also if it is a desktop, you have to open your cabinet, open the power and data cables of the hard drive and finally remove any screws to disengage the hard drive.
- Putting the internal hard drive into the external cover
- At the end of step 1, you should have the bare internal hard drive (fig p-5). Also you should by now have the external case for the hard drive which contains two parts, the head which includes the SATA to USB or IDE to USB adapter, the external connectors, may be an indicator LED etc and the body which covers your internal hard drive. The body if metallic prevents your hard drive from heating up. (fig p-6)
- Connect the head to the internal drive (fig p-7a, p-7b)
- Put the assembly inside the body (fig p-8)
- Fix the head to the body using screws which are supplied with the external hard drive case (fig p-9)
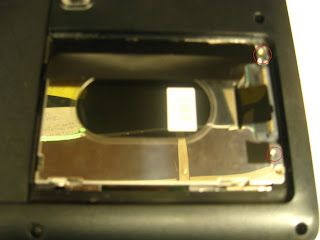 Fig p_2
 Fig p_3
 Fig p_4a
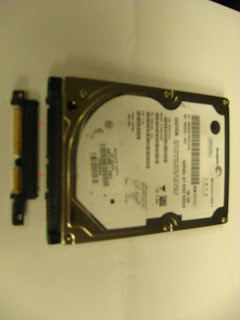 Fig p_4b
 Fig p_5
 Fig p_6
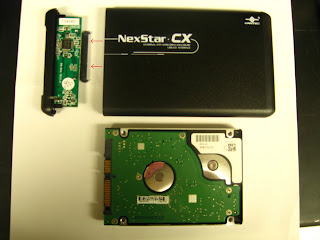 Fig p_7a
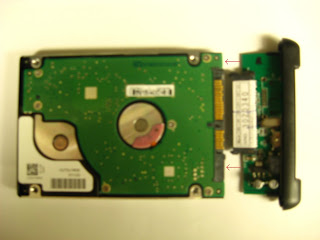 Fig p_7b
 Fig p_8
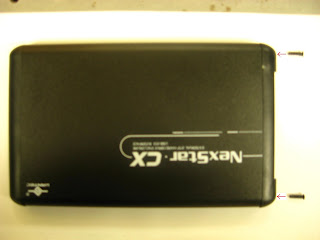 Fig p_9
There you have it! Your like-new portable USB external hard drive! It is useful, cheap, saves you a few bucks and helps the environment. Like your hard drive, there are more things you can use from your dead computer. Check before you throw away your next one.


